By T104 Andrew Toh, Morriz Tay and Zhane Chay
Part I: Photography Process & Tips
Step 1: Choose a suitable event
Find an event and determine the most optimal time and day for the event coverage. This decision can be made based on location, lighting or day of the week. For indoor events, natural lighting will usually be a non-factor but take into account the lighting of the location if it is suitable for your photoshoot. For outdoor events, decide if natural lighting will be a major factor in your photos, whether your photo coverage will take place in the day or night.
The day of the week or time can also affect how you may want to plan your shooting schedule. For carnivals and other similar events, you would typically avoid shooting on the first few days of the week (Monday to Wednesday) as these are main work days so you would probably get a smaller crowd at the events and your shots of the event may seem unusually empty or repetitive. Go on Friday to Sunday – that’s when you will be able to capture more interesting shots.


Step 2: Find a model
When covering an event, there are many shots that are usually difficult to get from the public crowd as many people can be camera shy and may want to avoid getting their photos taken by random photographers. In order to accomplish people photography, your shots require people in them. By using a model for your shots, you will be able to obtain these shots that members of the public may not help you with. Examples of these shots would be shots that require an unusual pose or framing.
For an event coverage, you are open to the wonders of possibilities and you can use as many subjects as you may require for your shots.

For an event coverage, you are open to the wonders of possibilities and you can use as many subjects as you may require for your shots.

Step 3: Set the scene by choosing the type of shot
Set the scene before you take a shot. There are many different shots including close-ups or wide shots in photography. To ensure a variety of shots and preventing repetitive photos, your photos will have to include the use of different shots so every photo will be different and fresh.
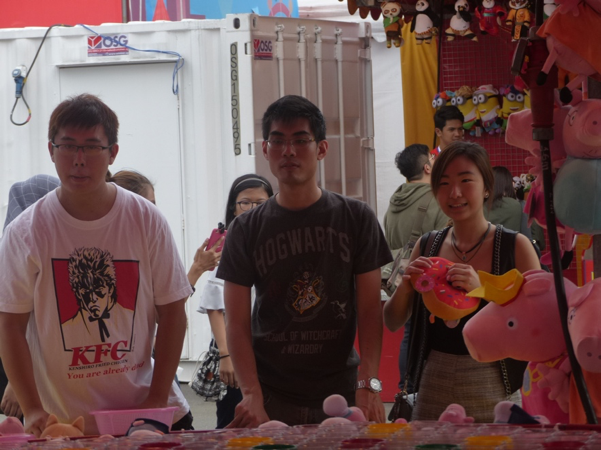
When taking a shot of ‘People at Work’ at an event, a wide shot should be used so you get a shot of both the attraction in the surroundings and the subject in the photo.
When taking a portrait shot, a close-up would be recommended so you can focus on the subject’s features rather than the background or foreground.
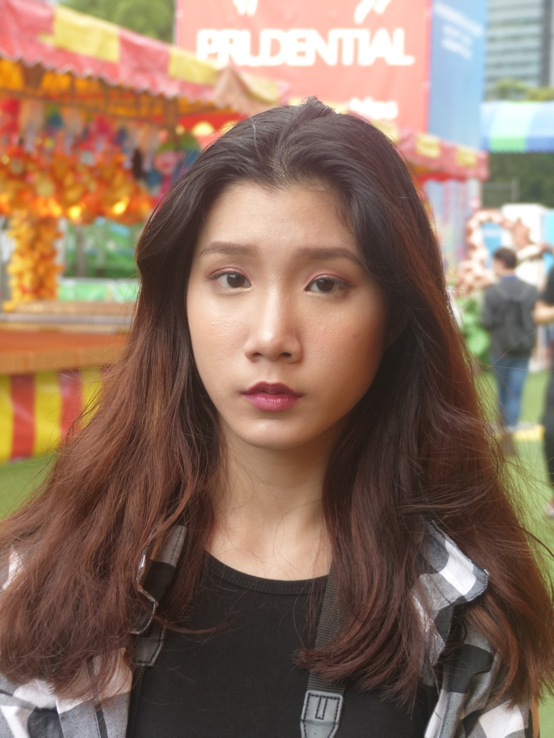
Step 4: Think about your subject’s pose
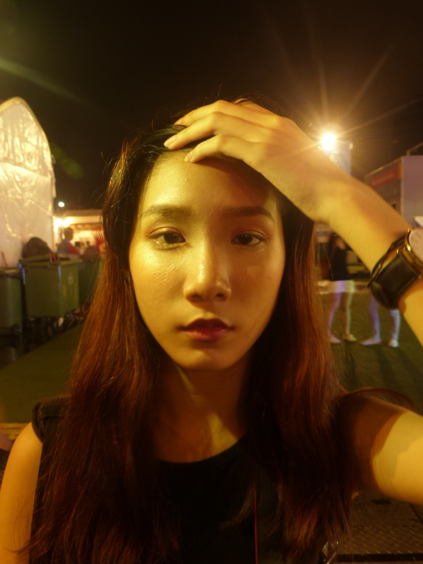
When using a model for your shot, you have the luxury to think of your subject’s pose in the shot. Especially in shots involving light, different poses and slight position changes can make a huge difference in the quality of a shot. With a subject well-posed, it can ensure that you achieve the requirements of a good portrait such as catch light in the subject’s eyes or a side light.
Step 5: Think about framing and composition
When it comes to photography, understanding compositional techniques is crucial to taking good photos. Compositional techniques are the basic foundations of a good photo. An example of a compositional technique is Framing. Framing refers to using elements of a scene to create a frame within your frame. The use of framing helps to give a photo context. By using framing, you direct the attention of the viewer to your main subject and it can be done in many ways. Even people in the scene can highlight your main subject which is human framing.
Step 6: Think about angle and perspective
There are many angles and perspectives a photo can be taken from: eye-level, low-angle, high angle, dutch-angle, birds-eye view and worms-eye view.
A high-angle shot is a shot in which the camera is physically higher than the subject and is looking down upon the subject. A high angle shot can make the subject look small or weak or vulnerable.
A low-angle shot is a shot taken from below the subject and has the power to make the subject look powerful or threatening. By changing around angles in your shots, you change the composition of your shots to achieve your desired photo.
It is also possible to achieve these results by changing the perspective of your shots. Shots can be taken in first-person POV or third-person POV. First-person POV shots are taken from the subject’s perspective and third-person POV shots are taken from a distance without the subject’s knowledge.
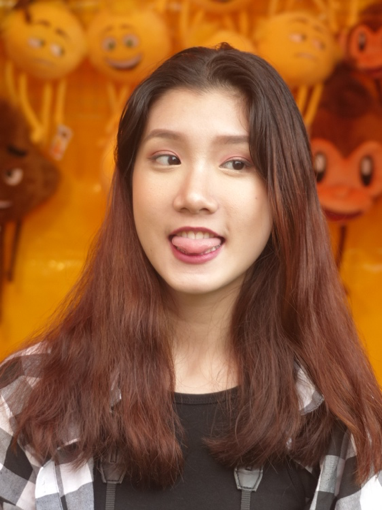
Step 7: Focus on the eyes of the subject
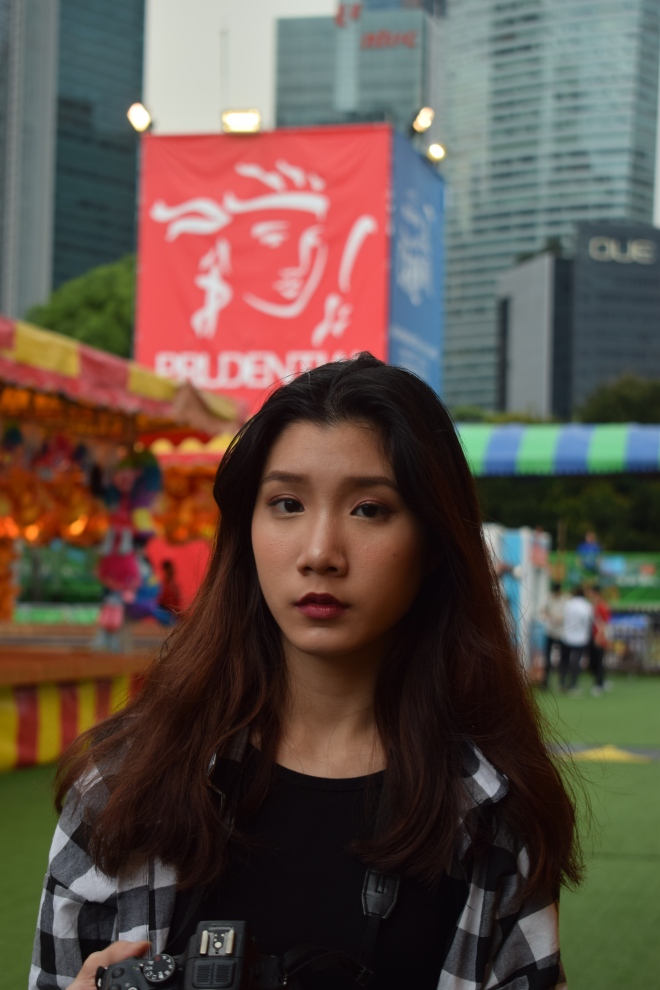
Portrait photos are relatively simple to take but there are certain elements you should aim to achieve in your photo. Aim to take a photo with catch light in your subject’s eyes. Catch light is the highlight of the light source reflected off the eye creating a sparkle in the black of the eye drawing the viewer into the photograph.
Another element in portraits you should include to create a better image is shallow depth. Shallow depth simplifies the background and helps the viewer focus on the subject. Light also aids in creating a better portrait. Side light brings out the contour of your subject creating form and adding depth to the subject.
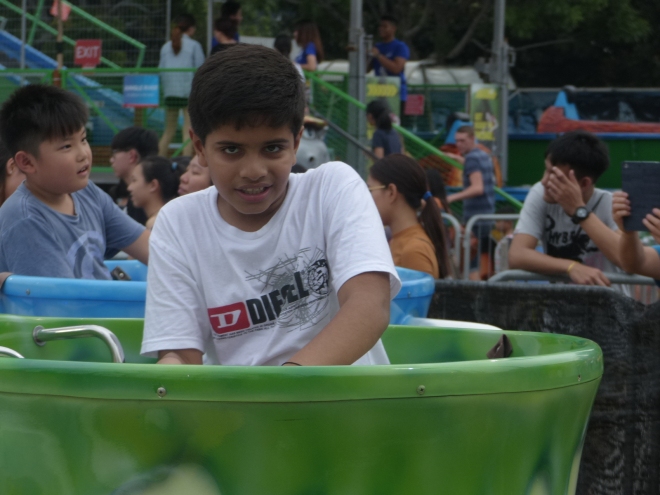
Step 8: Capture meaningful action
Capturing the “decisive moment” is a form of photography requiring the photographer to know exactly when to take a photo. The “decisive moment” is taken when something interesting or exciting happens.
In the decisive moment, every single movement in your frame could affect the outcome of your shot and can make a big difference to how you expected your photo to turn out. It could make your photo more aesthetically pleasing or it could ruin your photo.
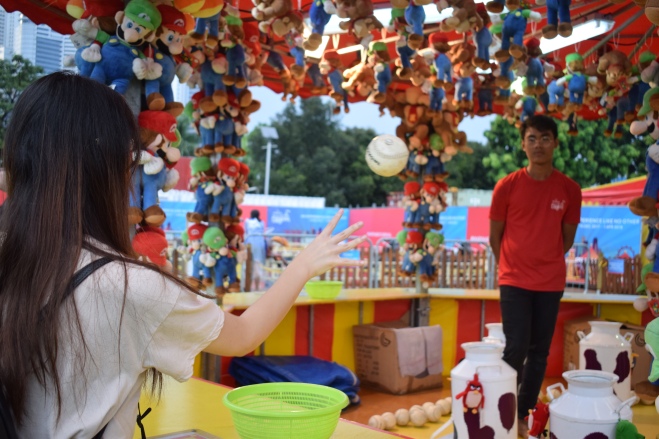
In an event such as a carnival, the place is full of said “decisive moments”. For example, a person playing a game throwing a ball. With the action of throwing a ball, it creates a decisive moment the second the ball leaves the subject’s hand.
Step 9: Post-edit for a better photograph
What happens if you take a shot with too much headroom but you feel like the shot is overall, still a really good photo? Post-editing can solve the problem. Simply crop the photo to achieve the desired outcome you intended to have in the first place.
Not many elements of photography and effects can be achieved on site at the event. It is then fine to do post-editing if you think it will enhance the quality of your shot.

You can also post-edit the colour of the photo to make it more saturated. Change up the hue, saturation, and luminance of the different colours in your picture. You can also make it brighter or darker, depending on your picture. In addition to cropping, try rotating your pictures to change it up.

Part II: Exploring Photography Skills
-
Playing with Speed- Freeze and Blur Motion
Shutter speed is one of the core basics of photography. Shutter speed is the length of time your camera is open, exposing light onto the camera sensor.
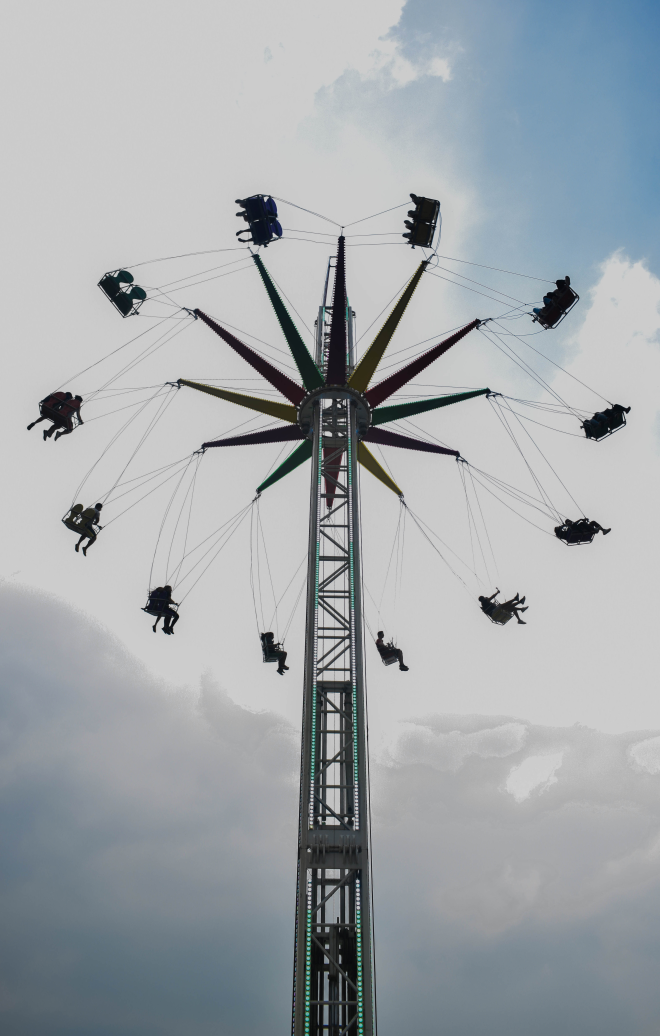
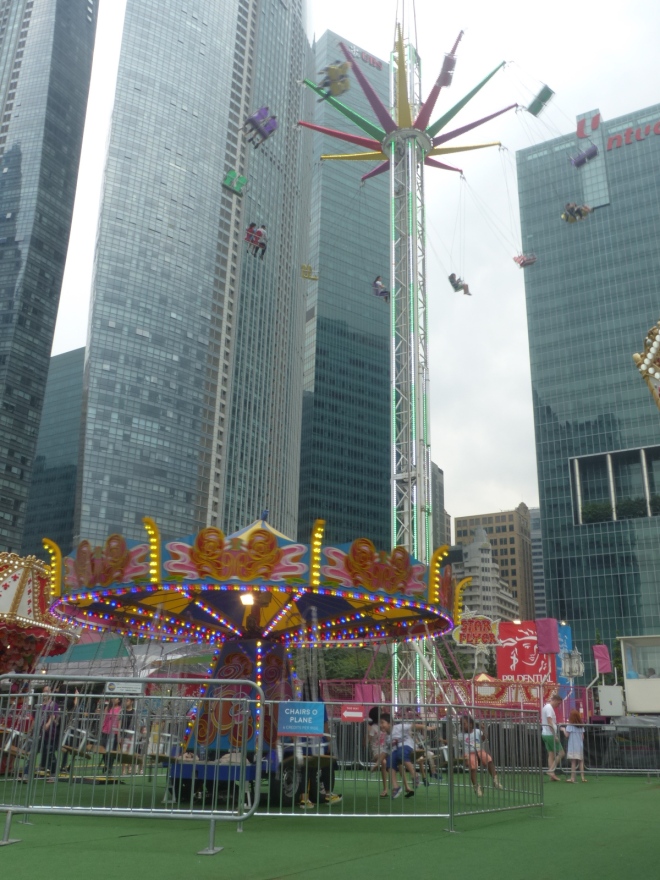
Freeze motion of spinning teacups If you use a fast shutter speed, you’re going to achieve a freeze in your photo. A fast shutter speed (1/2500) will allow lesser light to enter the camera as the camera shutter opens and closes rapidly, faster than a slower shutter speed. This will cause motion in the picture to freeze.

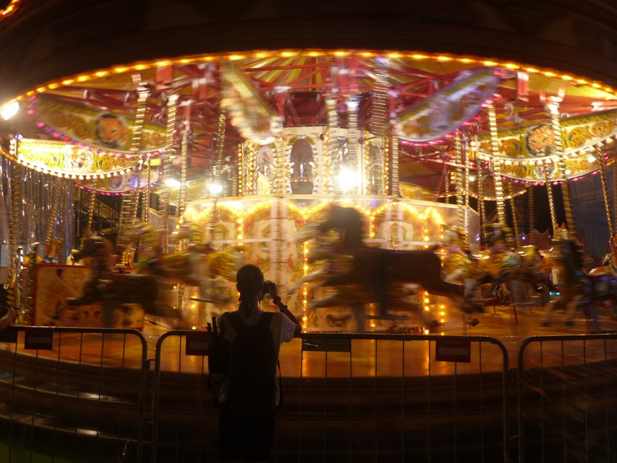
Blur motion of carousel If you use a slower shutter speed (1, 2s), more light will be allowed into the camera as the shutter will open and close at a slower rate compared to faster shutter speeds. When more light enters, the motion in the picture will blur.
Use shutter speed to attain your desired shots especially at carnivals where there are rides moving at high speeds. To capture a person’s facial expression or a shot of the ride, use a fast shutter speed (1/250,1/500) to freeze motion in your shot so you will be able to get a clear picture of your subject.
-
Playing with Depth
Leading lines, shallow depth of field 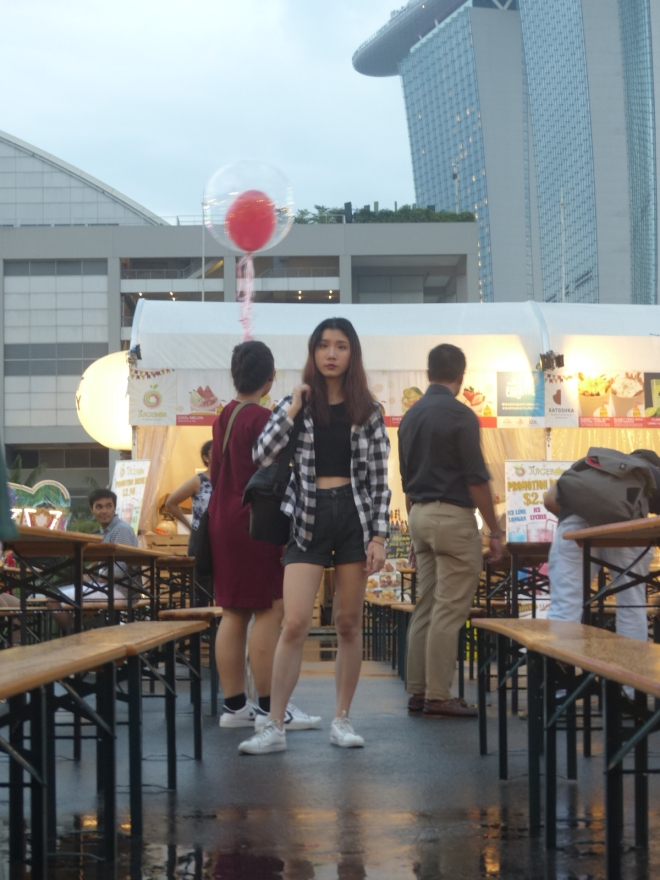
Leading lines, greater depth of field There are two main ways to play with depth in photography- Shallow Depth of Field or Greater Depth of Field. When playing with depth, take into consideration the 3 main factors- Aperture, subject distance and your camera lens.
To achieve shallow depth of field, you will want to go as close as possible to your subject in the shot and set your f-stop to f2.8. With a shallow depth of field, the background of your shot will appear unfocused and your subject will be in focus. This will help draw the focus of the viewer to the subject.
To achieve a great depth of field, you will want to move further from your subject and set your f-stop to f8.0. By using a great depth of field, you will provide a wide angle view of the background and surroundings in your shot. Great depth of field is usually used for wide shots or scenic shots.
-
Playing with Space and Proportion
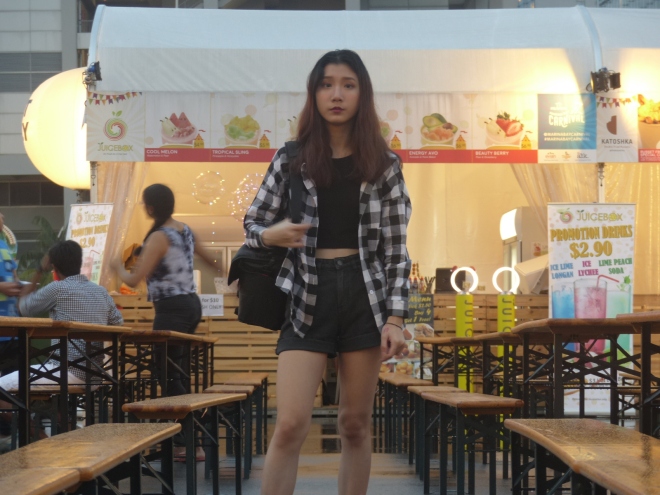
Playing with space is another form of framing. In your shots, there is positive space and negative space. Positive space is the subject or areas of interest and negative space is the area around the subject or the surroundings.
Playing with and making use of these two spaces could give you varying results of your shots. There are times when it is beneficial and more aesthetically pleasing to include more negative space in your shot and there are times when you will want to focus on your subject so there is more positive space in your shot.
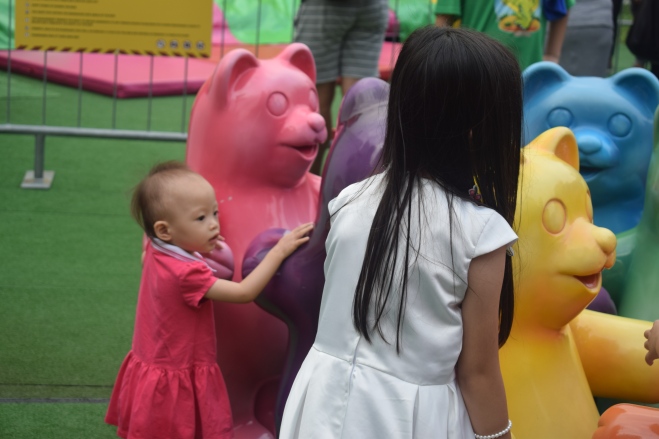
In this shot, there are two points of interests and between them is negative space. As the two points of interests are have vibrant colours are high impact in nature, the negative space is more dull with darker colours. This creates a contrast between the positive space and negative space in the photo balancing out the colours in the shot to make the photo more pleasing to look at.
Negative space -
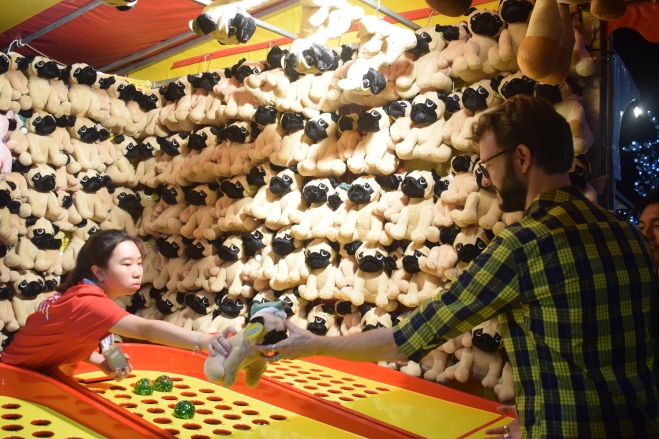
Playing with Visual Tension

Vision tension where viewers’ eyes are following the model’s line of sight to the ball Visual tension is the way of framing subjects in a dynamic way with elements to create photographs that draw the viewer in. The eye automatically looks for signs or indicators to better understand what we are seeing. Visual tension is a compositional technique that uses a variety of framing approaches to create dynamic elements in a photograph to draw and provoke the viewer’s eyes.
In photography, visual flow is used to lead the viewer’s attention from one end of the photo to another. To achieve visual flow, you will need a ‘visual anchor’ where the viewer’s eye can start its journey and visual progression can be aided by the transition of colour tones in the foreground to background, leading lines or look-room of the subjects.
-
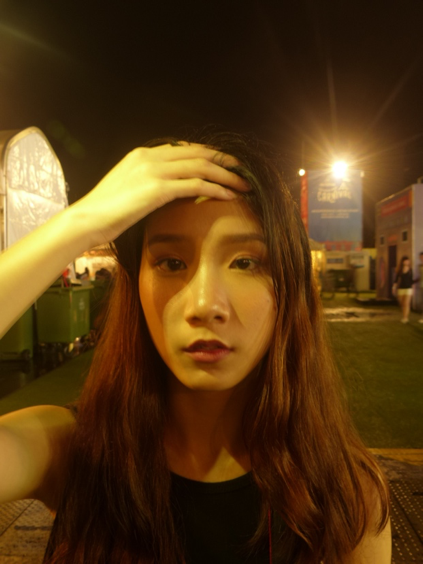
Playing with Light and Shadows
Lighting is used in photography to create different effects in a photo and can affect the mood of a photo. Manipulate lighting in your shots to achieve different shots and create texture in your photo.
With light comes shadows and making use of both light and shadows together and creating a harmony between the two factors create some of the best shots. A photo with only light eliminating shadows can result in the subject looking flat but by including shadows with the light, you provide a sense of shape to the subject and making the subject more three-dimensional giving the photo life.
There are also times when you want shadows to be the main highlight of your shots so light becomes the supporting role in achieving said effect. One such example is silhouettes. You use the lighting to create a silhouette of your subject and creates a contrast between light and shadow in your photo.
Part III: Covering an event
-
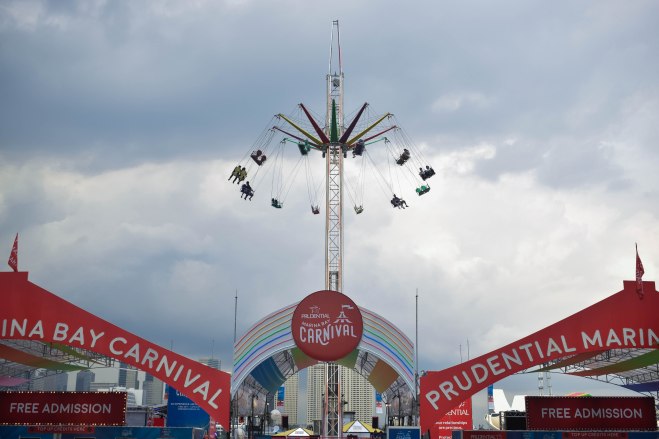
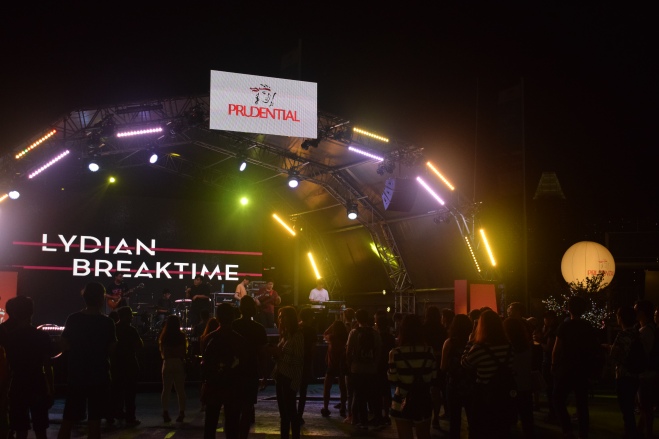
Give establishing shots of the event
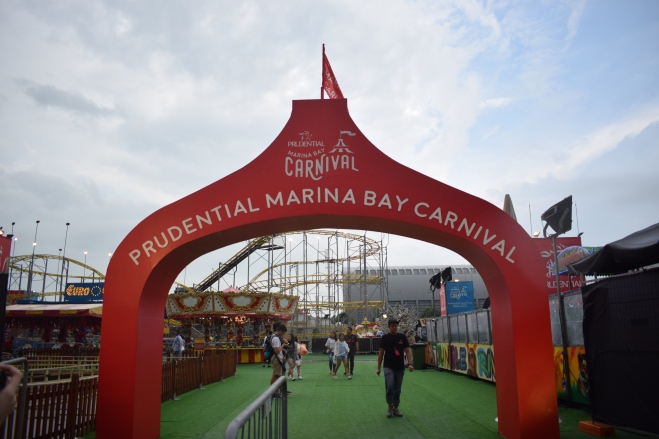
Carnival entrance Establishing shots give context to the event you are covering. Establishing shots can be wide shots of the event as a whole or a variety of shots of attractions at the event. These shots would give viewers a sense of what the event is about, like the crowd or weather. For example, a carnival would have many games and rides, so you would take shots of these to give viewers a sense of how this carnival is like.
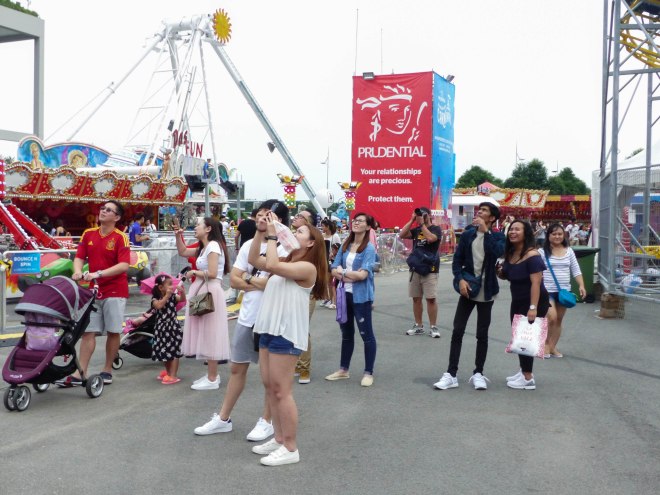
Crowd size -
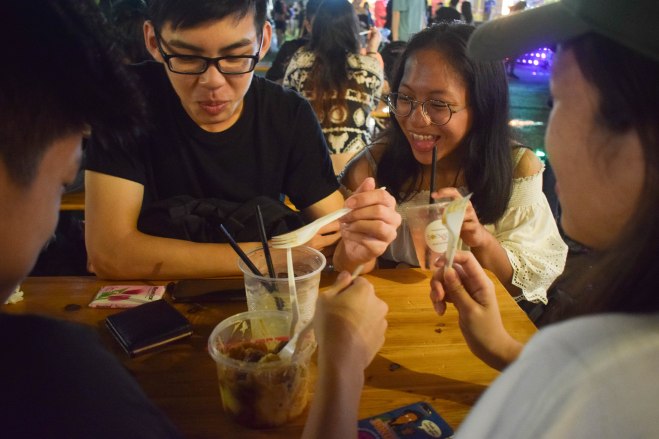
Capture humanity in the crowd
At an event, people photography is the main form of photography as there are crowds of people. People photography includes “People At Work”, “People Having Fun”, “People At Ease” and Portrait shots. Show the mood and atmosphere through your shots. At a carnival, you would typically take pictures of people playing the games or having fun on the rides. Capture their facial expressions to show the viewers the emotions that will be present at a carnival.
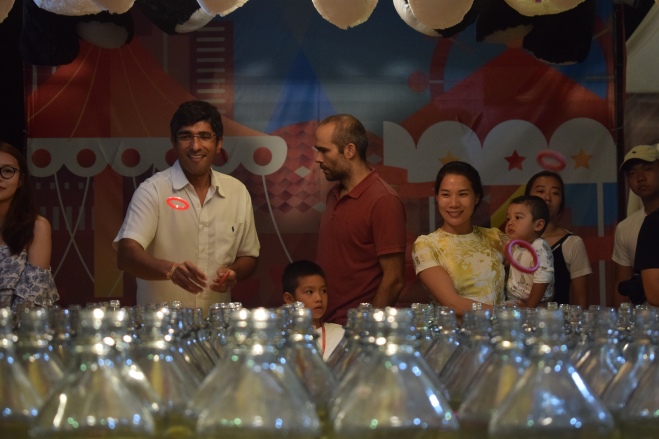
People having fun -smiles being captured 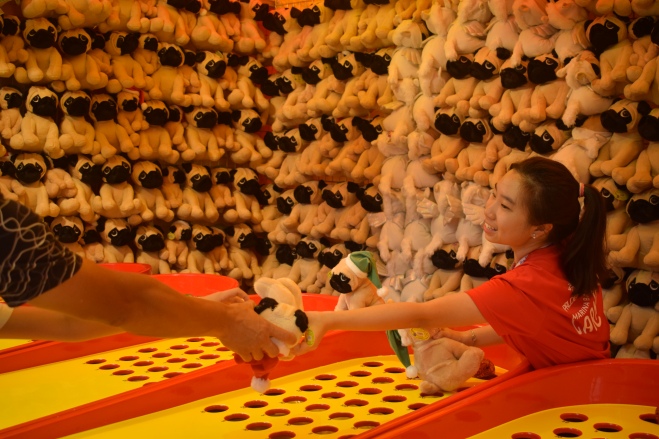
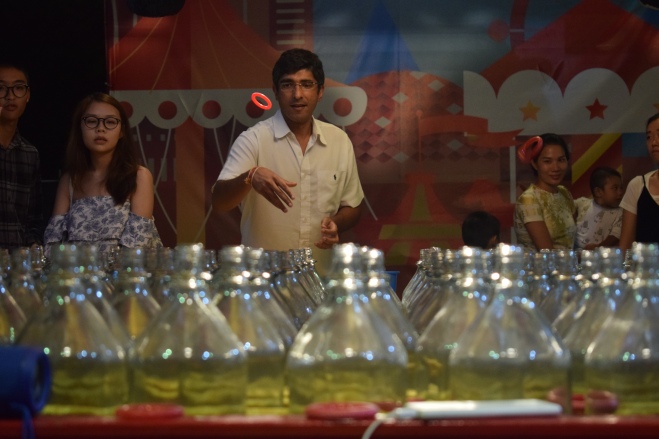
People at work 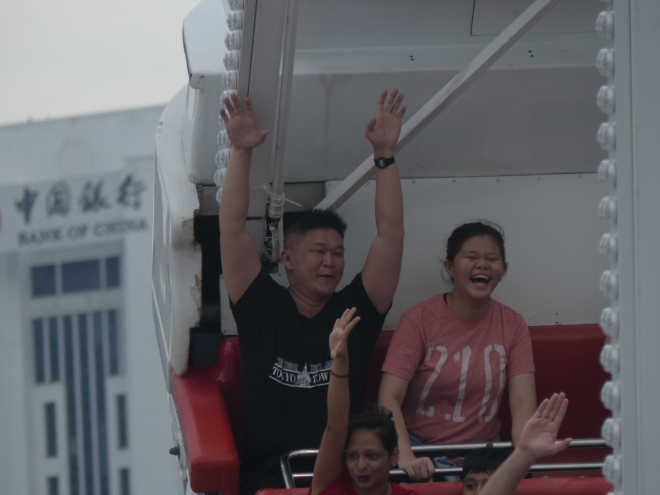
People having fun – laughter and hands captured 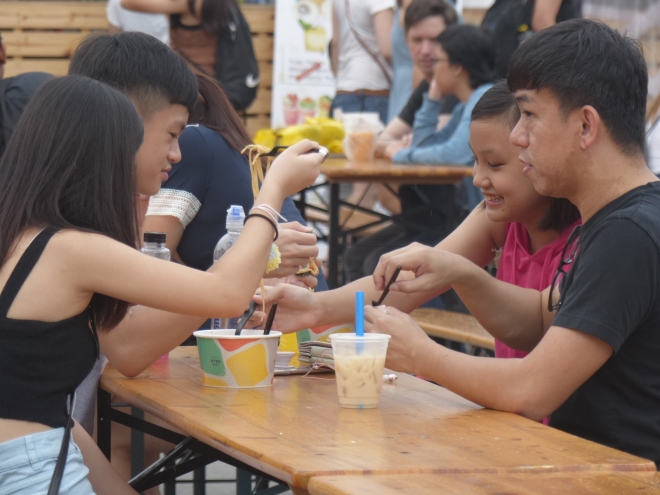
People at ease – eating -
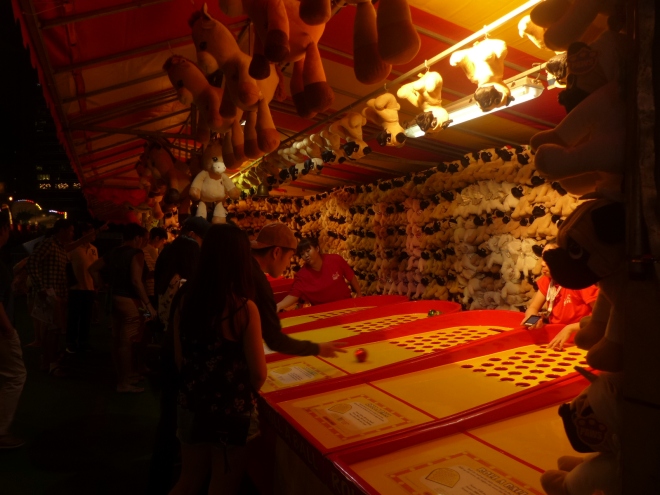
Capture details of the event

Carnival games Capture a variety of shots to give details of events. You can do so by taking different shot sizes, different angles, point of view and other skills.

-
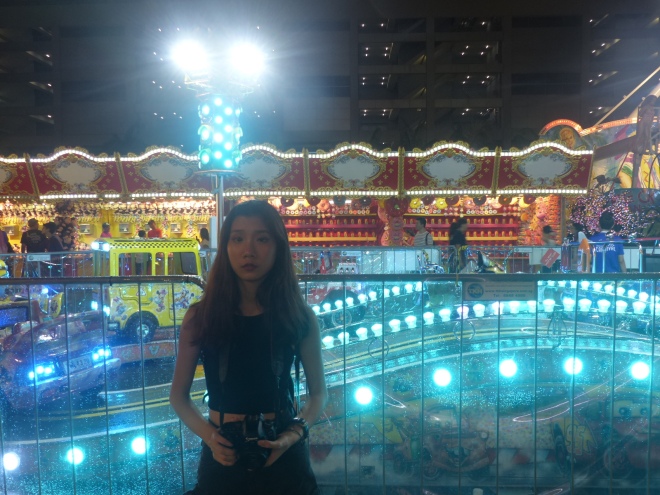
Capture big pictures to give context to the coverage
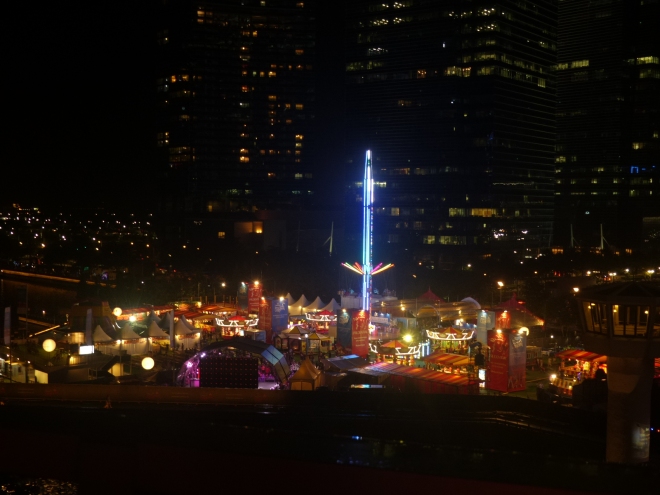
Shot of the whole event at night Big pictures are similar to establishing shots so you can show the viewers the whole event.
